The Start of Something Honda: New Timing Belt for My Civic
Most people probably know me as the girl wrenching on rusty old Volvos, but this time I’m switching things up. My latest project is a 1998 Honda Civic that I picked up as a fun little budget build. And to kick things off, I decided to dive straight into the deep end with a timing belt replacement — because what better way to get to know a new car?
Joy van Haelen
10/25/20252 min read
The Start of Something Honda: Replacing the Timing Belt on My Civic
There’s something oddly satisfying about the start of a new project — that mix of excitement, anticipation, and a bit of grease under your fingernails before you’ve even picked up a wrench. This week, I finally got started on my Honda Civic project, and the first job on the list was a big one: replacing the timing belt.
Now, I’ve spent most of my wrenching life working on Volvos, but diving into the world of Hondas felt like a fun new challenge. Spoiler: the Civic didn’t disappoint.
Getting Down to Business
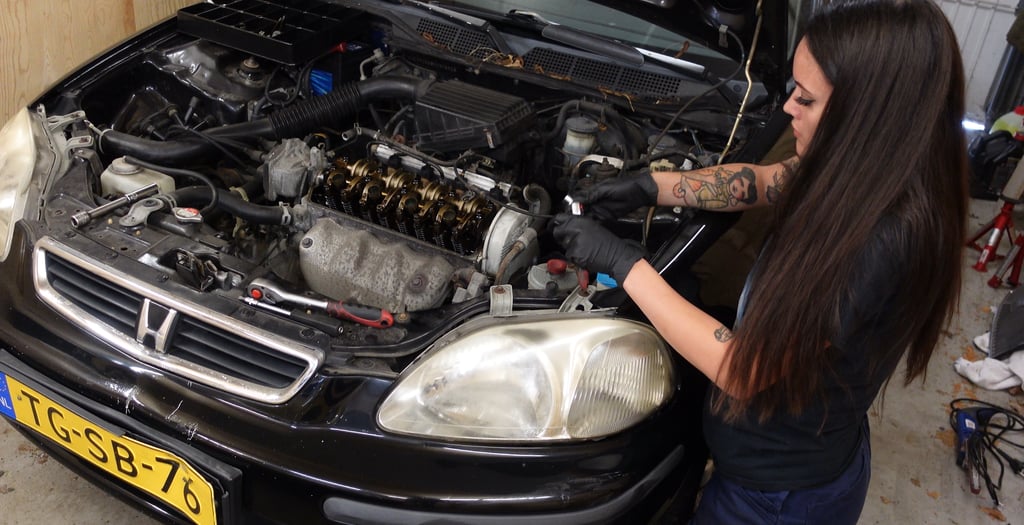
The first step was getting the valve cover off, which, as anyone who’s done this before knows, is basically the key to everything else. Once that was out of the way, the familiar rhythm of the job set in — spark plugs out for easier turning, covers off one by one, and soon the D-series engine was right there in front of me.
Even after years of working on other cars, there’s something satisfying about how straightforward Honda’s engineering is. Compact, logical, and — for the most part — friendly to work with.
Making Room and Moving Along
With the top end sorted, it was time to get to the business end of the job: the belts. Wheel off, dipstick out of the way, and a bit of creative maneuvering to reach all the bolts hiding in tight spaces.
This Civic might be small, but it makes you work for every millimeter of clearance. Still, everything came apart smoothly, and before long the timing cover was off and the old belt was staring back at me.
And yes, I did forget to order a new drive belt — but we’ll call that planned future maintenance.
Water Pump Woes (and Wins)
Since I was already in there, the water pump was next. Out came the old one — a relic that had seen better days — and in went a fresh new pump. A quick check to make sure the new part matched, a bit of cleanup with some well-worn towels, and it was ready to bolt in.
There’s always that moment when you drain the coolant where you think, this could go wrong fast — and yes, I did end up wearing a bit of it. Occupational hazard.
Everything Back Together Again
From there, it was smooth sailing. The new tensioner went in nicely, the belt lined up perfectly with the timing marks, and everything felt tight and precise. Once the timing cover, engine mount, and valve cover were all back in place, the Civic started looking like a car again instead of a parts diagram.
There’s always a great feeling when you lower the jack, step back, and the engine’s hanging on its own again — that little “we did it” moment.
The Best Part: It Runs Perfectly
When it was all said and done, I turned the key, and the Civic fired right up. Smooth idle, no strange noises, and everything lined up just the way it should. It’s hard to beat that feeling of success when a job goes right the first time.
There’s still a few things to tackle — like replacing those old drive belts — but this was a solid start.
This Civic might be a budget build, but so far it’s been pure fun to work on. And with the new timing belt and water pump in place, it’s officially ready for the next chapter in the project.
Check out the video on my YouTube!
