Prepping the Volvo 850R for Paint: A Weekend on the Doors
It started as a simple weekend plan: prep the Volvo 850R’s doors for paint. But peeling back trim, sanding away years of wear, and uncovering hidden dents turned into a bigger challenge than expected. With the help of friends (and plenty of bondo), the restoration inches forward — one panel at a time, on a tight budget, with plenty more to come.
Joy van Haelen
8/29/20252 min read
This weekend marked a big milestone in my Volvo 850R project — I finally started prepping the car for paint. Of course, there was no way to tackle the entire car in just two days, so I set my sights on the doors. With a little help from my friends Leon and Pascal, we made steady progress sanding, repairing dents, and getting everything closer to primer.
Stripping Down the Doors
The first step was removing all the trim and rubber pieces from the doors. Some parts came off easily, while others tested my patience. Those clips with tiny pins are always a headache — push them through and the pins inevitably vanish somewhere on the floor. The side moldings were stuck on with double-sided tape, so I carefully pried them off with a knife, making sure not to damage the rubber.
It’s not glamorous work, but it’s the foundation for everything that follows. A clean, stripped surface makes sanding smoother and the final paint job more professional.
Cleaning, Degreasing, and Spotting Dents
Once the doors were stripped, we gave them a thorough cleaning and degreasing. They were filthy, and sanding over dirt is a recipe for disaster.
With the panels cleaned up, I could finally see the imperfections. A couple of dents revealed themselves on one of the rear doors. To make them easier to spot, I lightly sanded the entire panel. The trick here is that the dented areas stay shiny, while the rest turns matte — it’s like the car tells you where it needs attention.
Sanding and Bondo
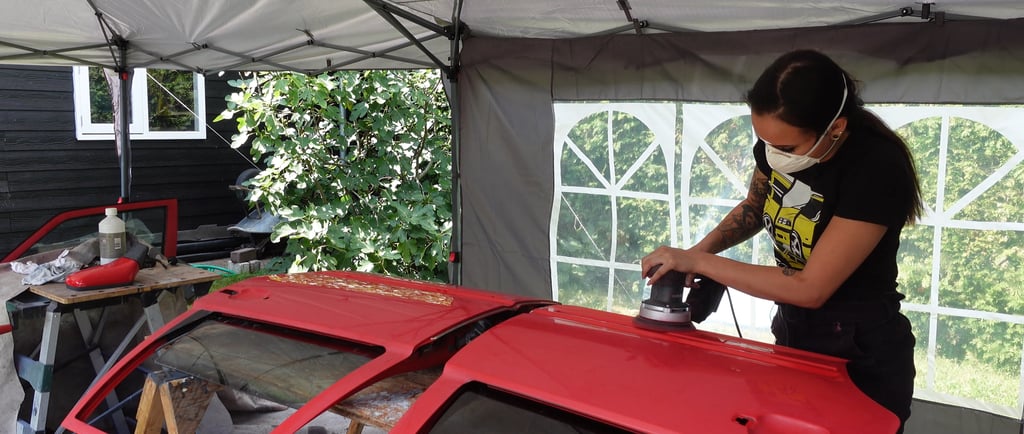
This is where teamwork made all the difference. While I wasn’t feeling my best, Leon and Pascal rotated tasks with me — sanding, mixing filler, disassembling, and repeating the cycle. Without them, I probably would have finished just one door.
We applied Bondo in thin layers, sanding between each one to keep the surface smooth. To check our work, we sprayed a light guide coat of black paint over the sanded areas. Any spots that stayed black after sanding showed us exactly where more filler was needed. It’s a simple trick, but it makes a huge difference in finding those sneaky low spots.
Wrapping Up the Weekend
By the end of sunday, all four doors were sanded, filled, and ready for primer. Unfortunately, the wash primer I ordered didn’t arrive in time, so we couldn’t seal them just yet. Leon is going to take care of that during the week, and next time I’ll be spraying the proper primer to lock in all that hard work.
I know some of you will notice I’m not using the best dust mask in the video. It’s true — professional-grade gear would be ideal. But since I’m building this project (and these videos) on a tight budget, sometimes I make do with the basics to keep things moving. This project is something I squeeze into weekends for fun, not a full-time gig, and I really appreciate all the advice and concern you share in the comments.
Looking Ahead
Even without getting to primer this weekend, seeing the doors lined up, smooth and ready, was a satisfying sight. The car is far from finished, but every step brings it closer to the fresh paint job it deserves.
Next time, I’ll finally be priming the doors — and from there, the rest of the 850R will start to follow.
Thanks for following along with this project! If you’d like to see the process in action, check out the full video down below. And as always, don’t forget to subscribe if you want weekly updates on the journey to bringing this Volvo back to life.
Watch the video on my YouTube!
